Contents
Description
This page describes installation of the Linear Electric Grippers.
Required Hardware
- 3mm Allen (Hex) Wrench
Installation File
PDF: Baxter Linear Electric Gripper Guide
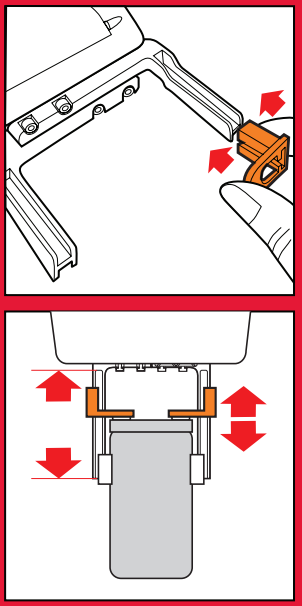
Step 1: Mount Gripper
This step describes proper attachment of the linear electric gripper.
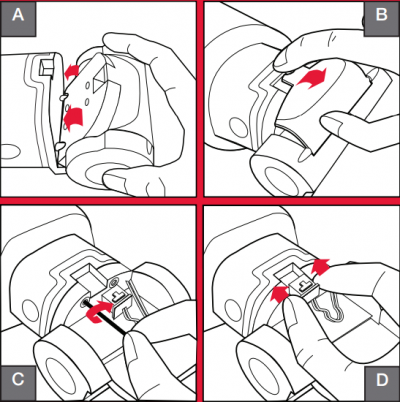
A: Hook Parallel Gripper onto two posts on hand
B: Open Door
C: Fasten Gripper with 3mm Hex and Screws
Important Note: Both screws must be tightened before inserting plug into receptacle.
D: Fully Insert Plug and Close Door
Important Note: When removing Gripper, disconnect plug first, then unscrew Gripper from hand.
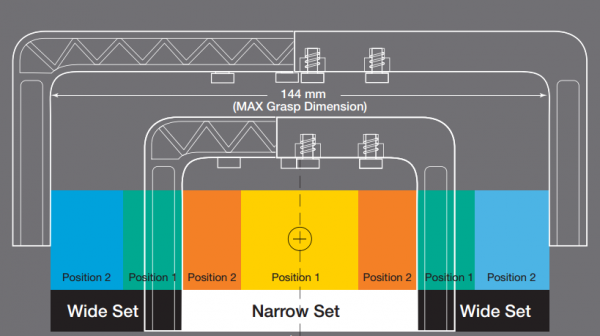
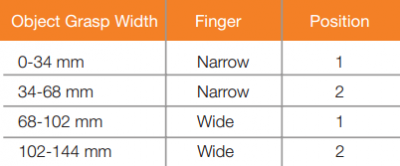
Step 2: Choose Fingers
Choosing fingers and fingertips will be object dependent. Please use the below dimensions to guide your finger decision.
Step 3: Attach Fingers
A: Align Fingers
Align nubs are provided on each finger to align with numbered position on gripper.
Alignment nubs face toward outside of gripper.
B: Secure with 3mm Hex and Screws
Step 4: Attach Limiters (Optional)
Limiters can help to stabilize object during grasp
Align and slide limiters onto fingers at
desired height, tighten screws.
Note: Limiters can be mounted on either side
for inside or outside grasp.
Step 5: Attach Fingertips
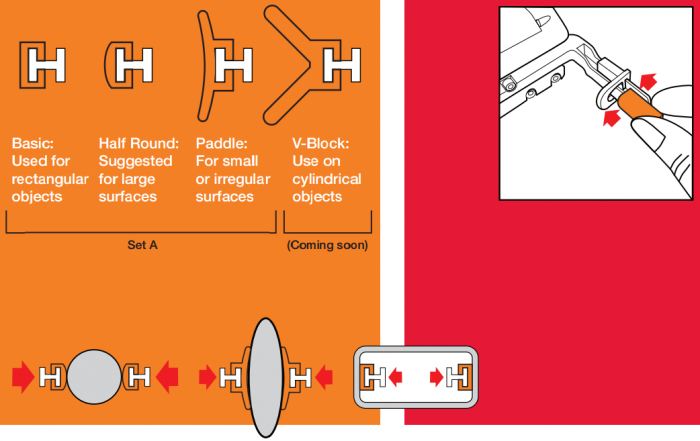
A: Select Desired Fingertips
Consider an object’s shape and surface finish when choosing a finger tip.
• Plastic: For pliable surfaces
• Silicone: For smooth, rigid or untextured surfaces
• Silicone sheet may be cut and adhered to finger tips to increase grip
B: Slide on Fingertips
Note: Reversible
Linked Here
- Baxter Hardware Setup - Baxter Hardware Setup Tutorial
Related Pages
- Baxter Vacuum (Suction) Gripper Installation - Instructions for Installing the Vacuum (Suction) Grippers.