Contents
- 1 Description
- 2 Important
- 3 Required Hardware
- 4 Installation File
- 5 Step 1: Remove Packaging
- 6 Step 2: Attach Carabiners
- 7 Step 3: Secure to Lift
- 8 Step 4: Detach Baxter from Crate
- 9 Step 5: Lift and Place Baxter
- 10 Step 6: Secure Baxter to Pedestal
- 11 Step 7: Release Baxter
- 12 Step 8: Level Baxter
- 13 Linked Here
- 14 Related Pages
Description
This page describes mounting Baxter on the standard pedestal.
Important
Baxter weighs 165 lbs (75 kg)
Please use proper precautions when moving Baxter.
A Hoist lift rated for at least 250 lbs. is suggested for such lifting.
Required Hardware
- 4 Hex Head Cap Screws (enclosed)
- 2 Carabiner Hooks (enclosed)
- 17mm Wrench
- 1/2˝ Wrench
- Tape Measure
- Flat Head Screwdriver
- Hoist/lift rated for at least 250 lbs.
Installation File
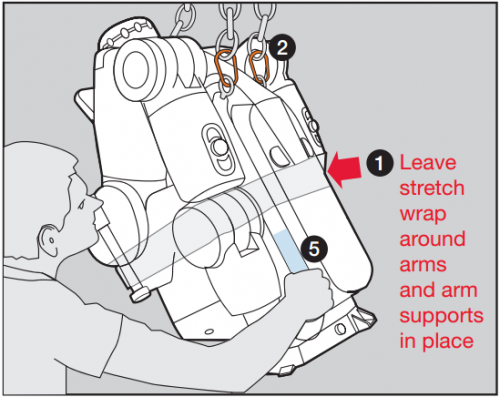
Step 1: Remove Packaging
Remove outer plastic bag, and foam around head and shoulders.
Leave stretch wrap around arms and arm supports in place until robot is mounted securely.
Step 2: Attach Carabiners
Attach the 2 enclosed carabiners hooks to shoulder bolts on the robot, marked with blue tabs.
Remove blue tabs after use.
Step 3: Secure to Lift
Attach chain hooks from lift to carabiners and secure other ends to lift.
Step 4: Detach Baxter from Crate
Using 1/2” wrench, remove 4 bolts and washers from crate at robot base.
Throw away bolts with packaging.
Step 5: Lift and Place Baxter
Using black metal handles to guide robot, lift robot to pedestal.
Align robot base to bolt holes.
Note: It is normal for the robot to tilt forward while hanging on a lift.
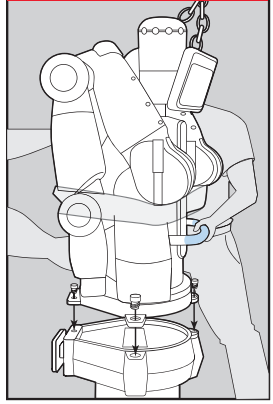
Step 6: Secure Baxter to Pedestal
Insert 4 enclosed Hex Head Cap Screws into 4 holes at base of robot.
Tighten screws finger tight until flush.
Using 17mm wrench, TIGHTEN A HALF TURN MORE.
Step 7: Release Baxter
Once robot is secured, release chain hooks from carabiners. Remove carabiners from shoulder bolts, and save in “Start Here” box.
Remove stretch wrap and arm supports.
Step 8: Level Baxter
It is important for Baxter to work in a level environment.
Use the pedestal's four available leveling feet to level Baxter. Please use the built-in round level (near electrical/network connectors) for verification.
Linked Here
- Baxter Hardware Setup - Baxter Hardware Setup Tutorial
Related Pages
- Baxter Alternative Surface Mounting - Instructions for Mounting Baxter on an alternative surface.